How to Prepare Your Home for Window Replacement
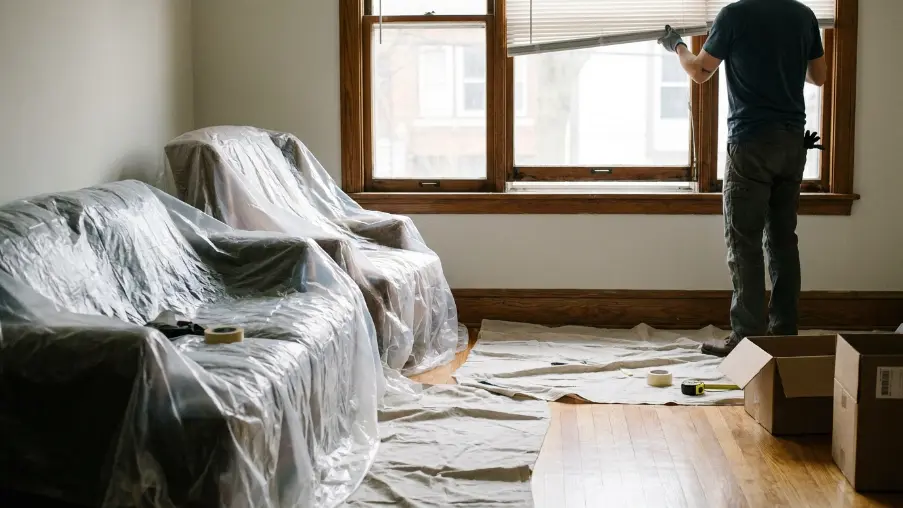
Preparing your home for window replacement starts with a few simple steps. Clear the work area. Protect nearby belongings. Make sure installers can easily access each window. Doing this helps the installation stay safe, efficient, and on schedule.
Once your installation date is confirmed, preparation becomes just as important as the new windows themselves. A little planning reduces disruptions and protects your home throughout the project. It also helps the installation crew work more efficiently from the moment they arrive.
During long heating seasons and changing weather, these small steps can make installation day much smoother. Read on to learn how to prepare your home for window replacement with practical tips that make the process easier from start to finish.
Why Proper Preparation Matters Before Window Replacement
A little preparation before installation day helps more than most homeowners realize. It protects your home, keeps the project moving efficiently, and allows installers to focus on quality workmanship instead of avoidable delays.
Creates a safer and more efficient workspace:
Installers need enough room to remove existing windows and position new ones safely. Clearing access inside and outside your home reduces the risk of accidental damage. It also helps the crew work more efficiently, especially when replacing larger picture or bay windows.
Protects your home during the installation process:
Window replacement naturally creates some dust and debris, particularly in older homes where trim or insulation may need careful removal. Preparing the work area beforehand makes cleanup easier and helps protect nearby furniture, flooring, and personal belongings.
Helps avoid weather-related delays:
Homeowners often schedule projects throughout the year, including colder months. If your installation falls during winter, clearing snow and ice from walkways gives the crew safer access. It also keeps the project moving despite changing weather conditions.
Supports better long-term performance:
Well-installed windows begin with a well-prepared workspace. Giving installers enough room to work helps expert window installation services in Winnipeg complete the job more safely, efficiently, and with greater attention to detail.
How to Prepare Your Home for Window Replacement
Whether you live in an older bungalow in St. James, a two-storey home in Fort Garry, or a newer development outside the city, these steps help your window replacement project stay on track from start to finish.
1. Clear the Area Around All Windows
Creating enough working space is one of the most important parts of window replacement preparation.
Many homes across Winnipeg and surrounding communities feature large front picture windows or wide living room openings. These require extra room for installers to safely remove the existing unit and position the replacement window without damaging nearby furniture or walls.
Before installation day, take a few minutes to:
- Move sofas, dining tables, desks, and other large furniture at least a few feet away from each window.
- Remove lamps, family photos, houseplants, and decorative items from window sills and nearby shelves.
- Roll up area rugs and clear hallways to create a safe path for carrying larger window units through your home.
- Unlock gates and move vehicles if they limit access to ground-floor windows or backyard entrances.
2. Protect Your Floors and Walls
Window replacement is usually clean, but installers still move tools and old units through your home, so a little prep helps protect surfaces and make cleanup easier.
To prepare your home:
- Cover hardwood, luxury vinyl, or tile flooring near each work area with protective sheets if needed.
- Remove delicate wall décor, mirrors, or artwork hanging beside windows.
- Keep entryways clear so installers don’t need to maneuver around obstacles.
- Store valuable or fragile items away from the work zone until installation is complete.
Many homes in established neighbourhoods still have original hardwood flooring and detailed interior trim. These finishes add character, but they also deserve extra protection during renovation projects.
3. Prepare Exterior Access Areas Carefully
Preparing the outside of your home is just as important as organizing the inside. Safe, unobstructed access helps installers work more efficiently, especially around larger front or rear-facing windows.
Before installation day:
- Trim shrubs or tree branches blocking access to windows.
- Move patio furniture, planters, grills, and outdoor décor away from work areas.
- Unlock gates and clear side yards so installers can easily reach rear-facing windows.
- Remove snow, ice, or muddy obstacles during colder months to improve safety and footing.
- Keep pets indoors while exterior work is underway.
- If you’re planning a future backyard renovation, keep it in mind while replacing rear-facing windows. For instance, you can partner with a trusted deck contractor in Newmarket to create a better connection between their indoor and outdoor living spaces.
4. Prepare Your Family for Installation Day
Window replacement temporarily changes how your home functions. Preparing everyone in advance helps the day run more smoothly while allowing installers to work safely and efficiently.
Before installation day:
- Let family members know which rooms will be inaccessible while each window is being replaced.
- Schedule work calls, online classes, or naps around the installation timeline whenever possible.
- Keep children away from active work areas where glass, tools, and ladders are being used.
- Arrange a quiet room for pets or consider leaving them with a friend if they’ll become anxious around loud noises.
- Keep everyday essentials, such as medications, chargers, or baby supplies, in an easy-to-reach location before work begins.
Many Manitoba homeowners schedule window replacement during spring, summer, or early fall when weather conditions are more predictable.
Even then, installers may briefly open several windows throughout the day. Planning ahead helps your family stay comfortable while allowing the project to move efficiently from room to room.
5. Disconnect or Check Security Features
Many homeowners don’t think about security devices until installation day. Taking a few minutes to check them beforehand helps prevent false alarms, protects your equipment, and avoids unnecessary interruptions while your windows are being replaced.
Before the installation crew arrives:
- Disable window and glass-break sensors if your security provider recommends it.
- Let your alarm monitoring company know if the system needs to be placed in service mode.
- Remove smart sensors or cameras mounted directly on the window frame, if possible.
- Label each device so it’s easy to reinstall after the new windows are in place.
- Test your security system once the installation is complete to confirm every sensor is working properly.
If your home uses a smart security system, checking these devices before installation can save time and prevent unexpected service calls later. It also helps expert window replacement services move forward without unnecessary delays.
6. Remove Window Treatments and Decorative Items
Removing everything around each window before installation day gives the crew immediate access and helps protect your belongings from accidental damage.
Before installation, remove:
- Curtains, blinds, shades, and valances.
- Curtain rods and mounting brackets, if possible.
- Decorative items, plants, candles, and family photos from window sills.
- Fragile artwork or mirrors hanging directly beside the window.
- Small furniture, such as accent tables or floor lamps, that may limit access.
What to Expect on Window Replacement Day
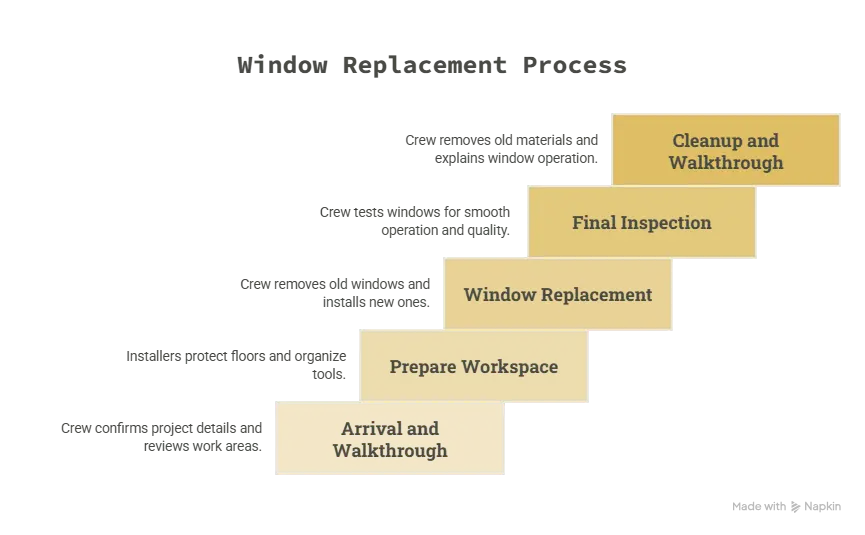
Most window replacement projects follow a straightforward process. Knowing what happens at each stage helps you feel prepared and gives you a better idea of how the day will unfold.
| Installation stage | What happens |
| Arrival and walkthrough | The crew confirms the project details, reviews the work areas with you, and answers any last-minute questions before starting. |
| Preparing the workspace | Installers protect your floors, organize their tools, and prepare each work area before removing the first window. |
| Window replacement | The crew removes each existing window, installs the new unit, adds insulation, seals the opening, and checks the fit before moving to the next window. |
| Final inspection | Installers test every window, confirm it opens and locks smoothly, and inspect the finishing details for quality. |
| Cleanup and walkthrough | The crew removes old materials, cleans the work areas, and walks you through the completed installation while explaining basic window operation and maintenance. |
Conclusion
A little planning protects your home, reduces unnecessary disruptions, and gives installers the space they need to deliver quality results. If you’re planning a window upgrade, the experienced team at SmartTech Windows & Doors is here to make the process simple, efficient, and stress-free from your first consultation to the final installation.
Frequently Asked Questions
How long does window replacement usually take?
Most standard window replacements take one day, although larger projects may take longer. The timeline depends on the number of windows, their size, and the condition of the existing frames.
Can you stay home during window replacement?
Yes. Most homeowners stay home during the installation. You’ll have access to most areas of your house, although installers may temporarily block rooms where they’re actively working.
Should I replace all my windows at the same time?
Not necessarily. Many homeowners replace windows in phases to match their budget. However, replacing multiple windows together often improves energy efficiency, installation consistency, and overall project value.
What time of year is best for window replacement?
Window replacement can be completed year-round by experienced installers. Many homeowners schedule projects during spring and fall, while others choose winter to address drafts and improve indoor comfort before the coldest weather arrives.
Do replacement windows increase home value?
Quality replacement windows can improve curb appeal, energy efficiency, and buyer appeal. They also enhance everyday comfort, making them a worthwhile investment whether you’re planning to sell or stay in your home.