Gaps Around Window Frames or Failing Caulking: Causes, Signs & How to Fix Them
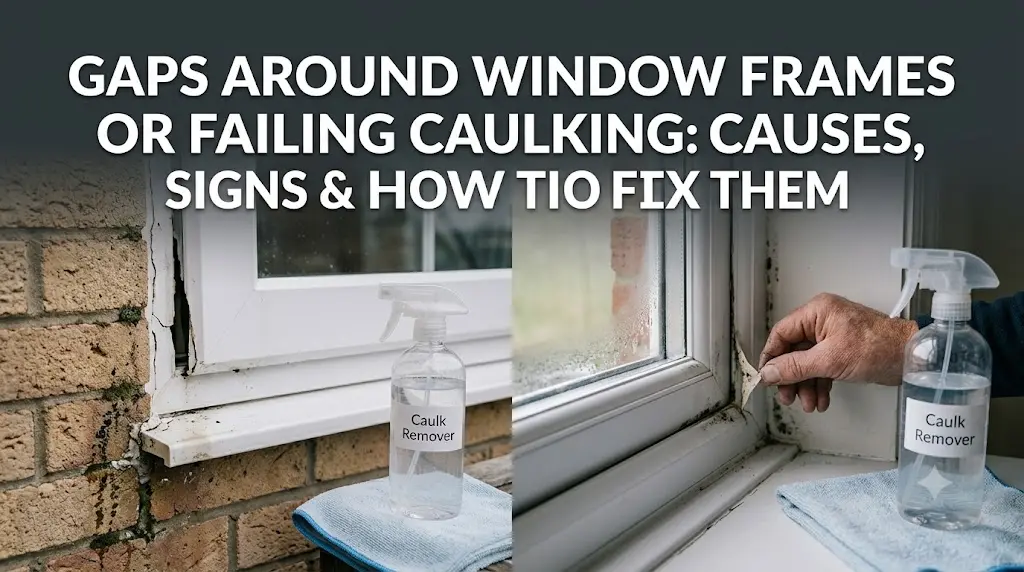
Gaps around window frames usually form because caulking deteriorates, materials expand and contract, or moisture weakens the seal. Left untreated, they allow drafts, water intrusion, mould growth, and higher energy bills.
Small gaps often appear long before serious damage becomes visible. Seasonal temperature swings, strong winds, and aging sealants can slowly break down the protective barrier around your windows.
Read on to learn the warning signs, repair options, and when replacement becomes the smarter long-term solution.
The Three Problems People Confuse
Before anything else, one distinction saves people the most money. What feels like a single problem is actually three, and they need three different fixes.
| The problem | Where it lives | What you notice | What fixes it |
| Failed perimeter seal | The caulking line between your window frame and the siding or stucco | Draft or light at the frame edge | Strip and reseal the joint |
| Empty rough opening | The hidden gap between the window and the framed hole it is installed in, behind your interior trim | A wide band of cold across the trim, not just at the edge | Lift the trim, insulate the cavity, air-seal it |
| Failed glass unit | Inside the sealed glass itself | Permanent haze or moisture between the panes | New glass unit, sometimes a new window |
Why Gaps and Failing Caulking Happen
Seasonal Expansion and Contraction
A normal January low here measures roughly -21°C, and a normal July high 26°C. Your caulking absorbs that 47-degree range every year, and because each material on the wall expands at a different rate, the joint between them absorbs the difference.
Longer joints accumulate more total movement, which is why the sealant on bow and bay windows usually splits first.
Our Climate Is Simply Harder on Sealant
Building codes score climates in “heating degree days,” a measure of how much heating a place needs. Winnipeg rates 5,670. Toronto rates 3,520.
In plain terms, our winters demand about 60 percent more heating, and put roughly that much more stress on every joint.
Ground Movement Beneath Your House
Most of this city was built on the old bed of Lake Agassiz, where dense clay reaches 30 metres deep. Clay swells when wet and shrinks when dry, so a wet spring followed by a dry August moves your foundation slightly. Your window frames move with it.
Sealant Past Its Service Life
Good exterior sealant lasts five to ten years in our climate. Cheap product often fails in three. If your house went up in 1955, its window perimeters have already been through seven seals or more, which is why older homes rarely carry a single clean layer of sealant.
Beads Layered Over Old Material
This is the failure we find most. On the post-war bungalows around Transcona we routinely cut through three separate beads before reaching bare material.
Nothing was stripped between them, so the bottom layer stopped sticking to anything decades ago while the surface still looked fine.
The Wrong Product, or a Joint Shaped Wrong
Every sealant tube states a movement rating. Class 25 stretches and compresses to about a quarter of the joint’s width, while Class 35 and Class 50 tolerate 35 and 50 percent. Window perimeters here need Class 35 or 50, and interior-grade acrylic latex, which carries no meaningful rating, chalks and cracks after one winter.
Shape matters just as much. A bead deeper than it is wide cannot stretch, so it splits early. The rule: no deeper than half the joint’s width.
Installation Shortcuts at the Rough Opening
Exterior caulking is the last step in the way a window gets installed, closing the gap between the window’s outer lip and your siding. Where that step got rushed, or the hidden cavity behind your trim was never insulated, even a good window starts leaking air within a few seasons.
Read More: Drafts Coming in Around Newly Installed Windows: What Homeowners Should Know
Common Signs Your Window Caulking Is Failing
A failing joint produces visible symptoms long before moisture reaches the framing, and most houses show two or three of them at once.
Visible Cracks or Gaps
Small cracks, open joints, or caulk that has pulled away from the window frame are clear signs the seal is no longer watertight. These problems often appear first on south- and west-facing windows, where constant UV exposure and temperature changes break down the sealant faster.
Peeling or Shrinking Caulk
Fresh window sealant stays flexible and firmly bonded to both surfaces. As it ages, it may shrink, become brittle, crack, or peel away from the frame or siding, allowing air and water to pass through the joint.
Cold Drafts Around the Window
This is the most frequent complaint we receive between December and February. Air felt at the frame’s edge, rather than across the glass, points at the caulking. Air felt across a wide band of trim points at the hidden cavity instead.
Water Leaks During Rain
Prairie storms drive rain horizontally against your walls. Damp trim, a puddle on the sill, or a dark line on the drywall below all mean water is already getting past the joint. Older parts of the city such as St. Boniface see this most, since many homes there still carry their original windows.
Condensation Around the Frame
Moisture gathering at the frame edges usually means cold air is reaching a surface that should be warm. Large fixed units such as picture windows show it earliest, simply because they hold the most glass. Your humidifier can cause the very same symptom, though, so that gets ruled out before anyone touches the caulking.
Mould or Mildew Growth
Dark speckling on trim, sills, or a drywall corner is the next stage, and it is the one that worries people most. Mould starts growing once the humidity right at a surface passes roughly 65 percent, which a wet joint reaches easily.
Rising Heating Costs
Damaged window caulking allows warm indoor air to escape and cold outdoor air to enter, making your heating system work harder. Over time, those small air leaks can reduce the performance of even energy-efficient windows and contribute to noticeably higher energy bills.
Read More: Sliding Patio Door vs French Door: Which Seals Better?
How to Check It Yourself in Ten Minutes
You don’t need special equipment to spot the early signs of failing window caulking. These six quick checks can help you determine whether the problem is the sealant, the window frame, or the insulated glass unit before calling a contractor.
1. The flashlight test
After dark, turn off the indoor lights. Have someone shine a flashlight slowly around the outside of the window frame while you watch from inside. If light appears around the frame, the exterior seal has gaps that need attention.
2. The draft test
On a windy day, hold a piece of tissue paper or an incense stick near the edges of the window. If the tissue moves or the smoke bends toward the joint, outside air is getting through the caulking.
3. The thumb test
Gently press the window frame and windowsill, especially near the bottom corners. Solid wood should feel firm. If the surface feels soft, spongy, or leaves a dent, moisture may have reached the material behind the paint.
4. The operation test
The window should open, close, and lock smoothly. If it sticks, rubs, or won’t latch properly, the frame may have shifted out of alignment. On sliding windows, however, a dirty track is often the simpler explanation.
5. The pane check
Check for fog, condensation, or a cloudy appearance between the panes. If the haze remains after cleaning both sides of the glass, the sealed glass unit has likely failed, not the caulking.
6. The stain check
Look below the window sill and along the surrounding trim and drywall for water stains, peeling paint, bubbling finishes, or mould. These signs indicate moisture has already entered the wall and the problem may extend beyond the caulking.
Read More: Garden Doors vs French Doors: Key Differences for Winnipeg Homes
How Professionals Repair Window Frame Gaps
Manitoba enforces the 2020 National Building Code, which sets out how windows are installed and sealed. Below are the six stages our crews work through at each opening. Any contractor should be able to walk you through the same list.
Step 1: Remove the Old Caulking
Every repair starts by removing the existing window caulking down to a clean, solid surface. New sealant won’t bond properly to cracked or deteriorated material, so all old layers must be removed before the repair begins.
Step 2: Clean and Prepare the Joint
Next, we clean the joint to remove dust, paint residue, old adhesive, mould, and other contaminants. The surfaces must also be completely dry, as proper preparation is one of the biggest factors in creating a durable, weatherproof seal.
Step 3: Install a Foam Backer Rod
For wider gaps, we install a foam backer rod before applying the sealant. This controls the depth of the joint, reduces unnecessary sealant use, and allows the finished seal to expand and contract without cracking as temperatures change.
Step 4: Apply New Exterior Sealant
We apply a high-performance exterior sealant rated for Manitoba’s freeze-thaw climate in one continuous bead. The sealant is then tooled to create full contact with both sides of the joint, preventing air leaks and directing rainwater away from the opening.
Step 5: Seal the Hidden Air Gap
If there’s an unsealed cavity behind the interior window trim, we remove the trim and fill the space with low-expansion spray foam or insulation before reinstalling it. This extra step improves energy efficiency and helps eliminate cold drafts around the window.
Step 6: Replace Damaged Window Trim
If moisture has damaged the window trim or window sill, those materials should be replaced before the new sealant is applied. Sealing over rotted wood only hides the problem temporarily. Replacing the damaged sections first creates a solid surface for the new seal and helps the repair last for years.
Read More: How to Prepare Your Home for Window Replacement
DIY vs Professional Window Caulking Repair

Not every window caulking repair requires a professional, but not every job is suitable for DIY either. The right choice depends on the window location, exterior finish, and whether the problem extends beyond the sealant itself.
| Situation | Our Recommendation |
| Ground-floor window with vinyl or metal siding | A DIY repair is often enough. |
| Second-storey or higher windows | Hire a professional. |
| Stucco or EIFS exterior | Hire a professional. |
| Soft or rotting window trim | Hire a professional. |
| Hidden gaps behind the interior trim | Hire a professional. |
| One or two window joints in dry weather | DIY is a reasonable option. |
| Whole-house window caulking | Hire a professional for the best results. |
For many homeowners, stucco is the point where a DIY repair becomes much riskier. Removing old sealant without damaging the finish takes experience, especially on EIFS and older stucco-clad homes.
Common DIY Mistakes
Even the best window sealant won’t last if it’s installed incorrectly. The most common mistakes we see include:
- Applying new caulking over the old sealant instead of removing it first.
- Sealing a joint that is damp, dirty, or not properly prepared.
- Using interior-grade caulk on an exterior window.
- Skipping the foam backer rod on wider joints.
Any one of these mistakes can cause the new seal to fail, allowing air and water back into the joint.
Why Homeowners Choose Our Team
Our factory-trained and certified installers repair window joints using materials designed for Winnipeg’s climate and proven installation methods that deliver lasting results. Every repair is backed by a lifetime warranty, giving you confidence that your windows will stay sealed, protected, and energy efficient for years to come.
How to Prevent Window Frame Gaps in the Future
Even the best window caulking won’t last forever. A little routine maintenance can extend its lifespan and prevent costly water damage later on.
Inspect Your Window Caulking Every Year
Check the caulking around your windows and doors every spring and fall. Look for cracks, shrinkage, gaps, or peeling sealant. Catching these early usually means a simple repair instead of a much larger restoration.
Replace Worn Sealant Without Delay
Once window sealant becomes brittle, starts pulling away from the frame, or develops visible cracks, it’s time to replace it. Resealing the joint promptly helps prevent water intrusion, air leaks, and damage to the surrounding materials.
Keep Drainage Paths Clear
Clear window weep holes, window sills, and eavestroughs regularly so rainwater can drain away properly. Standing water around the frame puts extra stress on the sealant and increases the risk of leaks during freeze-thaw cycles.
Deal With Water Damage Early
Don’t ignore water stains, bubbling paint, or soft spots around the window frame. Addressing moisture damage while it’s limited to the trim is far less expensive than waiting until it reaches the wall framing or insulation.
Don’t Forget Your Exterior Doors
The same caulking joints protect your front door, patio door, and other exterior doors. Because sliding patio doors expand and contract more than most windows, they often need resealing sooner. If the original installation wasn’t sealed correctly, replacing the surface caulking alone won’t solve the problem.
Schedule a Professional Inspection
If your windows are more than 20 years old, or you’ve noticed recurring drafts or leaks, a professional inspection can identify problems that aren’t yet visible. Checking the caulking, window frames, glass units, and hidden cavities together helps catch small issues before they become major repairs.
Read More: Awning vs Casement Windows: What’s the Difference?
When Should You Replace Instead of Recaulk?
Sometimes the joint is sound, and the window itself is finished. Six conditions point to replacement rather than repair.
- Repeated caulking failure. The same joint has been resealed twice or more and keeps opening, which usually means the frame is moving rather than the sealant failing.
- Rotting frames. Soft, spongy, or crumbling material in the frame, outer moulding, or sill. Sealant over rot lasts one season at best.
- A fogged glass unit. Haze or moisture trapped between the panes. The glass unit needs replacing, and often the whole window does.
- A warped frame. Visible bowing, twisting, or a sash no longer square in its opening.
- Leaks at several windows. Drafts across multiple openings, which points at your whole wall system rather than one worn-out bead.
- Age past twenty-five years. Single or double-pane units where a reseal costs real money and still leaves an inefficient window in the wall.
Conclusion
Gaps around window frames rarely mean a house needs new windows. The six checks and the results table above identify the actual cause, and addressing the joint before moisture reaches the framing is what keeps the repair small.
Homeowners sometimes apologise for calling about something this small. Small is when it is cheapest to fix. A free frame and seal inspection is a phone call away at (204) 318-6162, or at our office on 646 Erin Street.
Frequently Asked Questions
Can exterior caulking be applied during a Winnipeg winter?
Yes, with cold-weather formulations, though it works as a temporary seal only. Permanent work needs a dry surface above roughly 5°C, which puts it in spring or fall.
Which sealant performs best in this climate?
A silicone or polyurethane rated Class 35 or 50 for movement. Acrylic latex belongs indoors. Outside, it chalks and cracks after one prairie winter.
Is my problem the caulking or my humidifier?
Frost on the glass usually means indoor humidity. At -30°C outside, condensation begins around 18 percent relative humidity, so the humidistat is the first stop. A draft at the frame edge means the seal.
How long should exterior window caulking last?
Five to ten years when the product suits the joint and the prep was done properly. Anything failing faster reflects a prep or product problem, not our weather.
Can new caulking go over the old bead?
No. Fresh sealant cannot bond to degraded material, so the joint fails from underneath while looking fine on top. Full removal is the only approach that holds.